Sindhi Chautha Recipe New English
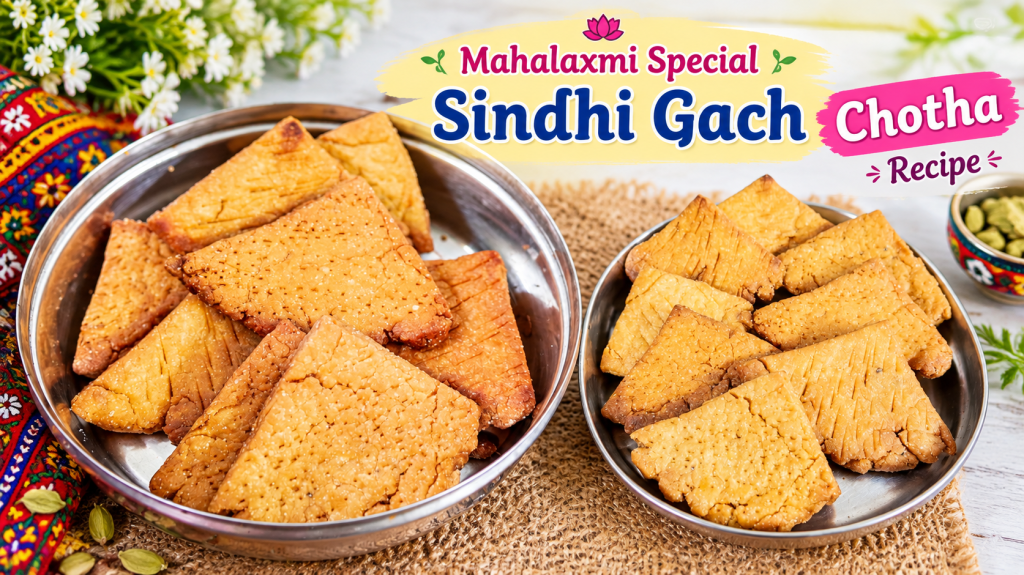
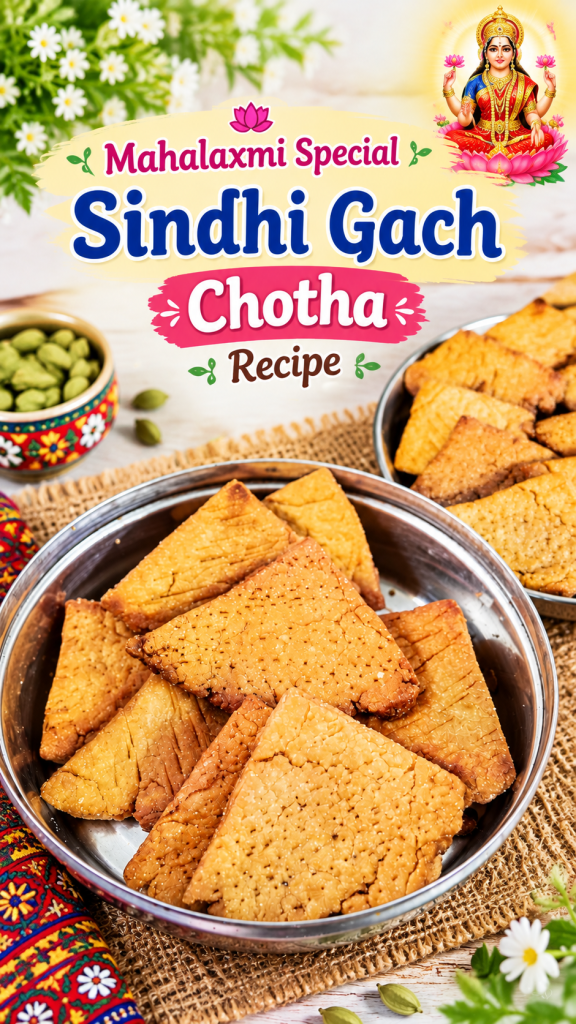
🌸 Mahalaxmi Special Sindhi Gach / Chotha Recipe / Chopaa Recipe / Sindhi G^acch / Sindhi Fried Mithi Mani
Traditional Sindhi Fried Mithi Mani | Crispy Sindhi Cookies | Sindhi Special G^ach
✨
Have you ever tasted a traditional Sindhi sweet that is made without an oven, looks simple, but becomes beautifully crisp, crunchy and irresistibly delicious after slow frying?
This authentic Sindhi Gach, also called Gahch or Chotha, is a traditional fried Mithi Mani made with maida, semolina, ghee, sugar and cardamom—and the real secret is in the dough consistency and patient low-flame frying!
🌸 This traditional Sindhi Gach / Chotha is especially made for the auspicious occasion of Mahalaxmi Puja. It is also enjoyed during festivals, family celebrations, traditional Sindhi gatherings and other शुभ occasions. ❤️
Complete-ready authentic Sindhi Gach / Gahch / Chotha recipe in English, with detailed cooking method, exact measurements, live cooking secret tip, frying guidance, FAQs, SEO content, audience questions, and a recipe video.
One small terminology note: “Chautha” literally refers to a quarter/fourth, because the rolled disc is cut into four pieces. “Gach/Gahch” and regional names can vary among Sindhi families, so I’ll preserve the traditional names rather than treating one spelling as the only correct one.
🎯 🌟 Your Queries:-
- Mahalaxmi Special Sindhi Gach Recipe | Traditional Crispy Chotha | Sindhi Mithi Mani
- Authentic Sindhi Gach / Gahch Recipe | Crispy Fried Mithi Mani Without Oven
- Sindhi Chotha Recipe | Traditional Sindhi Cookies | Crispy & Delicious
- Mahalaxmi Special Pakwan | Sindhi Gach | Traditional Fried Sweet
- Sindhi Gach Recipe | Crispy Sindhi Cookies Without Oven | Festive Special
- Sindhi Mithi Mani / Gach | Authentic Traditional Sindhi Sweet Recipe
❓❓🙋♀️ Let’s Find Out the Answers to These Questions!
- How to Make Authentic Sindhi Gach at Home Without an Oven?
- What Makes Traditional Sindhi Gach So Crispy and Crunchy?
- How Do You Fry Sindhi Chotha Without Breaking Them?
- Why Should Sindhi Gach Be Fried on Low Flame?
- How to Make Perfect Sindhi Mithi Mani with Simple Ingredients?
🔎 SEO Keywords
Primary Keywords:
- Sindhi Gach recipe
- Sindhi Gahch recipe
- Sindhi Chotha recipe
- Sindhi Mithi Mani
- Sindhi cookies
- Sindhi traditional sweet
- Sindhi fried sweet
- Sindhi festive recipe
- Mahalaxmi special recipe
- Sindhi Thadri recipe
Long-Tail Keywords:
- authentic Sindhi Gach recipe
- how to make Sindhi Gach at home
- crispy Sindhi Gach without oven
- traditional Sindhi Chotha recipe
- Sindhi fried Mithi Mani recipe
- Sindhi cookies without oven
- easy Sindhi traditional recipe
- Sindhi festive sweet recipe
- Sindhi Diwali traditional recipe
- homemade Sindhi cookies
- Sindhi Thali special sweet
🏡 About This Recipe
Sindhi Gach / Gahch / Chotha is a traditional Sindhi fried sweet prepared from simple pantry ingredients such as refined flour, semolina, sugar, ghee and cardamom.
The dough is intentionally kept stiff rather than soft, rolled thick, divided into four pieces and carefully pricked before frying. These thick pieces are then patiently fried on a low to low-medium flame, allowing the inside to cook properly while the outside develops a beautiful golden-brown colour and crisp texture.
This is a wonderful traditional Sindhi Thali special, festive recipe and homemade sweet for family occasions, Diwali, celebrations, gifting and traditional Sindhi gatherings.
🍪 Recipe Introduction
There is something very special about traditional recipes that use only a handful of ingredients yet create such a memorable flavour.
Sindhi Gach is one such recipe. The fragrance of ghee and cardamom, the slightly rustic edges, the thick crunchy texture and the deep golden colour make these traditional Chothas truly special.
And the most important part?
Patience while frying!
Unlike thin biscuits or regular puris, Gach is thick and delicate, so it needs careful handling and slow frying.
🌸 Mahalaxmi Special Sindhi Gach / Gahch / Chotha Recipe ❤️
Learn how to make this traditional Sindhi fried sweet with simple pantry ingredients. Sindhi Gach, also known as Chotha, is a crispy, golden and delicious traditional sweet that is especially enjoyed during Mahalaxmi celebrations, festive occasions, Sindhi Thali, family gatherings and traditional celebrations. ✨
In this detailed recipe, I’ll show you step-by-step how to:
🍚 Prepare the sugar syrup
🌿 Add fragrant cardamom
🥣 Make the perfect stiff dough
🤲 Roll the Gach to the correct thickness
🔪 Cut it into traditional Chotha pieces
🍴 Prick the pieces for even cooking
🔥 Fry them slowly to achieve a beautiful golden colour and crisp texture
❄️ Cool and store them properly for lasting crispness
⭐ Important Secret Tip: Add the sugar syrup gradually and make sure the dough remains firm and stiff, not soft like roti dough. The correct dough consistency and slow frying are the keys to perfectly crisp Sindhi Gach.
If you enjoy traditional Sindhi recipes and festive homemade sweets, do try this recipe and share your experience in the comments. ❤️
👍 Like | 💬 Comment | 🔖 Save | ↗️ Share | 🔔 Subscribe
👩🍳 Meena Manwani Cooking Tutorial
#SindhiGach #SindhiChotha #MahalaxmiSpecial #SindhiRecipe #SindhiSweet #SindhiCuisine #TraditionalRecipe #IndianSweets #FestiveRecipe #HomemadeSweet #SindhiFood #MahalaxmiRecipe
📝 Recipe Summary
✍️ Author Name – 👩🍳 Meena Manwani (Meena Manwani Cooking Tutorial)
Details
Information
Recipe
Sindhi Gach / Gahch / Chotha
Traditional Name
Sindhi Mithi Mani
Cuisine
Sindhi
Type
Traditional Fried Sweet
Texture
Crisp, crunchy outside with a firm traditional bite
Method
Deep frying
Oven Required
❌ No
Difficulty
Moderate
Servings
8 Chothas
Best For
Festive occasions, Sindhi Thali, Diwali, gifting, tea-time
Main Flavour
Ghee + Cardamom
Cooking Style
Traditional slow frying
⏱️ Cooking Time
- Sugar preparation: 2 hours soaking/melting time
- Dough preparation: 10–15 minutes
- Dough resting: 10–15 minutes
- Shaping and rolling: 10–15 minutes
- Frying: approximately 20–30 minutes, depending on size and oil temperature
- Total active preparation: approximately 45–60 minutes
- Total including sugar soaking: approximately 2½–3 hours
Note: The frying time can vary because Gach is thick. The important thing is not the clock alone—the colour, texture and internal cooking should guide you.
🥣 Equipment Used
- Small saucepan
- Large mixing bowl or traditional parat
- Measuring cups and spoons
- Rolling board / chakla
- Rolling pin / belan
- Knife or pizza cutter
- Fork
- Deep frying kadai
- Slotted spoon / jhara
- Steel strainer
- Plate or tray
- Airtight storage container
🧾 Ingredients for 8 Sindhi Chothas
For Sugar Syrup
Ingredient
Quantity
Approx. Weight
Sugar
½ cup
approx. 100 g
Water
½ cup
approx. 120 ml
Green cardamom
4–5 whole
approx. 1 g
For the Dough
Ingredient
Quantity
Approx. Weight
Maida / all-purpose flour
2 cups
250 g
Semolina / sooji
¼ cup
approx. 40–45 g
Salt
¼ tsp
approx. 1–1.5 g
Pure ghee
¼ cup
approx. 50–55 g
Prepared sugar syrup
as required
from above
For Frying
- Ghee or neutral cooking oil – approximately 500–750 ml, depending on the size of your kadai and depth required.
Important: You may not consume all of the oil/ghee; some remains in the kadai.
👩🍳 Preparation – Keep Everything Ready First
Before beginning the actual dough preparation, keep all the ingredients measured and ready.
1️⃣ Measure ½ cup sugar and ½ cup water.
2️⃣ Keep 2 cups / 250 g maida, ¼ cup semolina, ¼ tsp salt and ¼ cup ghee ready.
3️⃣ Keep 4–5 green cardamoms ready.
4️⃣ Keep your rolling board, rolling pin, knife/pizza cutter and fork ready.
5️⃣ Keep a clean plate or tray ready for the shaped Chothas.
6️⃣ Make sure your frying kadai is completely dry before adding oil or ghee.
🍯 STEP 1 – Prepare the Sugar Syrup
1️⃣ Soak the Sugar
Take a small saucepan and add:
½ cup sugar + ½ cup water.
Mix gently.
Allow the sugar and water to sit for approximately 2 hours, stirring occasionally, until the sugar melts completely.
Why soak the sugar first?
This helps the sugar dissolve more evenly before it goes into the dough. We are not making a thick one-string sugar syrup here.
We only need a smooth, dissolved sugar-water mixture.
2️⃣ Strain if Required
If your sugar contains any visible impurities, strain the dissolved mixture through a fine strainer.
Set it aside.
🌿 STEP 2 – Prepare the Cardamom
Take 4–5 whole green cardamoms.
Lightly crush them.
Remove the outer cardamom husk and collect the small black/brown seeds.
What about the cardamom husks?
Don’t throw them away.
You can:
- Add the dry cardamom husks to your regular sugar container for natural fragrance.
- Add them to your tea container.
- Use them while making tea or other aromatic preparations.
The husks can still contribute aroma, even though we don’t want them inside the Gach dough because the texture will not be pleasant.
3️⃣ Crush the Seeds
Slightly crush the cardamom seeds.
Don’t make them into a completely fine powder.
Small crushed pieces give the traditional Gach a lovely cardamom aroma and occasional flavourful bites.
🌾 STEP 3 – Prepare the Flour Mixture
Take a large mixing bowl or parat.
Add:
2 cups / 250 g maida
Then add:
¼ cup semolina
¼ tsp salt
¼ cup pure ghee
Finally, add the lightly crushed cardamom seeds.
Mix everything thoroughly.
🧈 STEP 4 – Check the Ghee Mixing – VERY IMPORTANT
Use your fingertips to rub the ghee into the flour mixture.
Keep mixing until the flour resembles coarse breadcrumbs.
Now take a small amount of the mixture in your palm and press it firmly.
The correct test:
If the mixture holds its shape when pressed, your ghee has been incorporated properly.
If it immediately falls apart like completely dry flour, rub and mix a little more.
Why is this important?
This step distributes the ghee evenly throughout the flour.
It contributes to the characteristic crisp and rich texture of traditional Gach.
🍯 STEP 5 – Add the Sugar Syrup & Make a Stiff Dough
Now gradually add the prepared sugar syrup.
Do not pour everything at once.
Add a little syrup, mix, then add more only if required.
Bring the mixture together into a tight, stiff dough.
🚨 IMPORTANT – Do NOT make soft roti dough
Traditional Gach dough should not be soft, loose or stretchy like chapati dough.
The dough should be firm enough to roll into a thick disc and hold its shape.
✋ STEP 6 – How to Knead the Dough Correctly
This is an important traditional-style step.
Once the flour mixture starts coming together, use both palms.
1️⃣ Press
Place the dough on your work surface.
Use the heels of both palms to press the dough forward.
2️⃣ Bring It Back
Bring the dough back towards yourself.
3️⃣ Press Again
Again use the heels of your palms with light but firm pressure.
You don’t need to knead it aggressively like bread dough.
4️⃣ Flatten
With the heels of your palms, gently press and flatten the dough.
Why use the heels of the palms?
The heel of the palm gives controlled pressure and helps bring a stiff dough together without making it soft through excessive kneading.
The final dough should feel:
firm + smooth enough to roll + not sticky + not soft.
⭐ SECRET TIP – LIVE COOKING STEP
🔐 Secret Tip: Don’t add all the sugar syrup at once!
Always add the sugar syrup gradually.
Different brands of maida and semolina can absorb liquid differently. If you add all the syrup at once, the dough can accidentally become too soft.
👉 The moment the dough comes together into a firm, stiff consistency, stop adding syrup—even if a little syrup remains.
This one step makes a big difference when you want Gach that holds its shape and fries properly.
🕐 STEP 7 – Rest the Dough
Cover the dough with a clean cloth or plate.
Let it rest for 10–15 minutes.
Why rest the dough?
Resting allows the flour and semolina to absorb the moisture properly and makes the dough easier to roll.
It also helps the dough settle before shaping.
⚪ STEP 8 – Divide the Dough
After resting:
1️⃣ Divide the dough into 2 equal-sized portions.
2️⃣ Take the first portion.
3️⃣ Shape it into a compact dough ball.
4️⃣ Keep the second portion covered so it doesn’t dry out.
🛞 STEP 9 – Roll the Gach
Lightly grease your rolling board and rolling pin with a little ghee.
Place one dough ball on the board.
Roll it gently into approximately a:
5–6 inch diameter disc
Maintain approximately:
½ inch thickness
This thickness is important.
Why should Gach be thick?
Traditional Gach is not supposed to be as thin as a puri.
Its characteristic texture comes from the thick disc and slow frying.
If you roll it too thin, it can become overly hard or cook much faster than intended.
🌾 STEP 10 – Don’t Worry About Rough Edges
The edges of traditional Gach may look slightly uneven or rustic.
That is absolutely fine.
In fact, those slightly rough edges are part of the traditional homemade appearance.
If you want a more uniform presentation, you may use a suitable mould or gently smooth the edges.
But for an authentic homemade look:
Keep those rustic edges! ❤️
🔪 STEP 11 – Cut into Four Chothas
Once the disc is rolled:
Use a knife to cut the disc into four equal quarters.
What does Chautha mean?
“Chautha” means one-fourth or a quarter.
Since the round disc is divided into four quarters, these pieces are traditionally referred to as Chotha/Chautha, depending on family or regional pronunciation.
You can also use a pizza cutter to make clean cuts.
🍴 STEP 12 – Prick the Surface and Sides
This is another very important step.
Take a fork or knife and prick the surface of each piece.
Also prick the sides/edges carefully.
Why prick Gach?
Because the Gach pieces are quite thick.
When they are heated in hot oil, moisture inside the dough can create steam and pressure.
Pricking gives that steam a way to escape and helps reduce excessive puffing or uneven cooking.
It also helps the pieces maintain their traditional shape.
🍽️ STEP 13 – Keep the Chothas Carefully
Transfer the prepared pieces to a plate.
Do not stack them on top of each other.
Keep a little space between the pieces.
Why?
The dough pieces are delicate before frying.
If you stack them, they can stick together or break when you separate them.
Repeat the same process with the second dough ball.
🔥 STEP 14 – Heat the Oil or Ghee
Take a deep frying kadai.
Add enough oil or ghee so the Gach pieces can fry comfortably without touching the bottom continuously.
Heat on medium flame initially.
How to check the oil temperature without a thermometer?
Take a tiny piece of dough and gently drop it into the oil.
Correct temperature:
The dough should rise gradually with small to medium bubbles around it.
It should not turn dark immediately.
If the dough becomes brown very quickly, the oil is too hot.
🔥 STEP 15 – Lower the Flame Before Adding Gach
Once the oil reaches the correct temperature:
Lower the flame to LOW-MEDIUM.
This is extremely important.
Gach is thick and needs time to cook from the inside.
If you fry on high heat:
❌ Outside may brown quickly
❌ Inside may remain undercooked
❌ Texture may become hard
❌ Colour can become too dark before the centre cooks
🍪 STEP 16 – Carefully Add the Gach
Very carefully slide a few Gach pieces into the oil.
🚨 Don’t overcrowd the kadai.
Leave enough space for the pieces to move and cook evenly.
🤫 STEP 17 – DON’T TOUCH THEM IMMEDIATELY
This is one of the most important parts of the entire recipe.
Once the pieces enter the oil:
Leave them undisturbed for the first few minutes.
Don’t immediately flip them.
Don’t repeatedly move them with the spoon.
Don’t poke them unnecessarily.
Why?
Freshly added Gach pieces are delicate.
The outer layer has not yet set.
If you disturb or flip them too early, they can:
- crack,
- crumble,
- break,
- lose their shape,
- release crumbs into the oil.
So here you need patience.
🔄 STEP 18 – Move the Oil, Not the Gach
After the outer surface begins to set, gently move the oil around the pieces with your slotted spoon.
At this stage, do not immediately flip the Gach repeatedly.
Allow the surface to firm up first.
🔄 STEP 19 – When to Flip
Once the lower side has become firm and lightly golden, gently flip each piece using a fork or slotted spoon.
Timing is important.
Flip too early → the Gach may crumble.
Flip too late → one side may become excessively dark or overcooked.
So watch the colour and firmness rather than following a rigid minute-by-minute rule.
🕰️ STEP 20 – Fry Slowly & Patiently
Continue frying on LOW to LOW-MEDIUM flame.
Turn the pieces only occasionally.
Allow each side to develop a beautiful deep golden-brown colour.
This recipe needs patience.
Gach is thick, so it naturally takes longer to fry than thin puris or small biscuits.
Don’t increase the flame simply because the frying is taking time.
Remember:
Slow frying = properly cooked centre + crisp texture + beautiful colour.
🚫 Why Not High Flame?
High flame can make the outside look ready very quickly while the inside is still not properly cooked.
The traditional Gach needs gentle heat to gradually cook through.
So:
❌ High flame – avoid
❌ Constant flipping – avoid
❌ Repeated poking – avoid
✅ Low/low-medium flame – use
✅ Gentle handling – use
✅ Patience – essential
🔄 STEP 21 – Don’t Flip Again and Again
Once you have turned the Gach, allow the second side to cook.
Don’t keep turning it every few seconds.
Why?
Repeated flipping can:
- cause cracks,
- disturb the crust,
- make delicate pieces crumble,
- increase oil absorption,
- make frying uneven.
Turn only when necessary.
🥄 STEP 22 – Check for Doneness
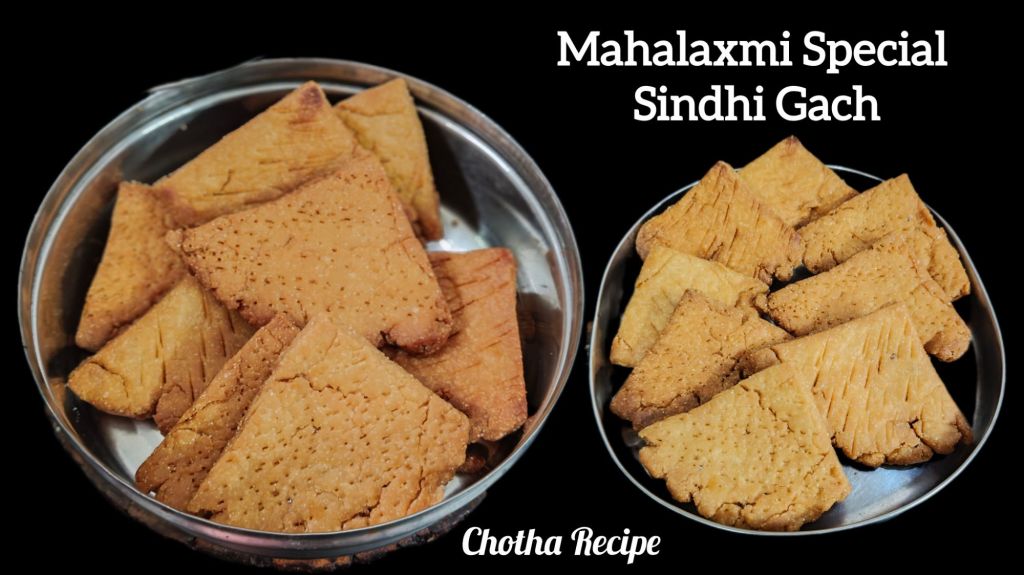
Your Gach should become:
✔️ Deep golden brown
✔️ Firm
✔️ Crisp on the surface
✔️ Properly fried through
✔️ Fragrant with ghee and cardamom
The colour will deepen slightly as it cools.
🥄 STEP 23 – Remove Carefully
Once properly fried:
1️⃣ Remove the Gach gently using a slotted spoon.
2️⃣ Hold it over the kadai for a few seconds.
3️⃣ Allow excess oil to drain.
4️⃣ Transfer it to a steel strainer or suitable draining surface.
5️⃣ Continue frying the remaining pieces in batches.
🌬️ STEP 24 – COOL COMPLETELY
This step should not be skipped.
Place the fried Gach in a single layer.
Allow them to cool completely at room temperature.
Important:
Don’t immediately close them inside an airtight container while hot.
Steam trapped inside the container can make the Gach lose its crispness.
⭐ Why Does Gach Become Darker and Crunchier After Cooling?
This is completely normal.
When freshly fried, Gach may feel slightly softer.
As it cools:
colour deepens + moisture settles + texture becomes firmer and crunchier.
So don’t judge the final crispness while the Gach is still hot.
🫙 STEP 25 – Storage
Once the Gach has cooled completely:
Place them in a clean, completely dry airtight container.
Keep the container at room temperature in a cool, dry place.
Avoid moisture and humidity.
🍽️ How to Serve Sindhi Gach
Sindhi Gach can be served:
- With evening tea
- With morning chai
- As a festive sweet
- As part of a Sindhi Thali
- During traditional family occasions
- As a homemade Diwali treat
- As a festive snack
- Alongside other Sindhi traditional dishes
🎁 Gift Packing Ideas
For gifting:
1️⃣ Allow Gach to cool completely.
2️⃣ Wrap individual pieces in food-safe butter paper or parchment paper.
3️⃣ Place them in a decorative festive box.
4️⃣ Add a food-safe liner.
5️⃣ Arrange the Gach without crushing the pieces.
6️⃣ Add a small label such as:
“Traditional Homemade Sindhi Gach – Made with Love ❤️”
This makes a beautiful homemade festive gift.
🥡 Tiffin / Lunchbox Packing
For a child’s or adult’s tiffin:
- Pack only after completely cooling.
- Use a dry airtight snack box.
- Keep Gach separate from moist foods.
- Don’t pack with chutney or wet ingredients.
- For school tiffins, cut/serve smaller portions if preferred.
Kid-Friendly Idea
Because these are crunchy and mildly flavoured with cardamom, you can offer a small piece as a homemade festive treat.
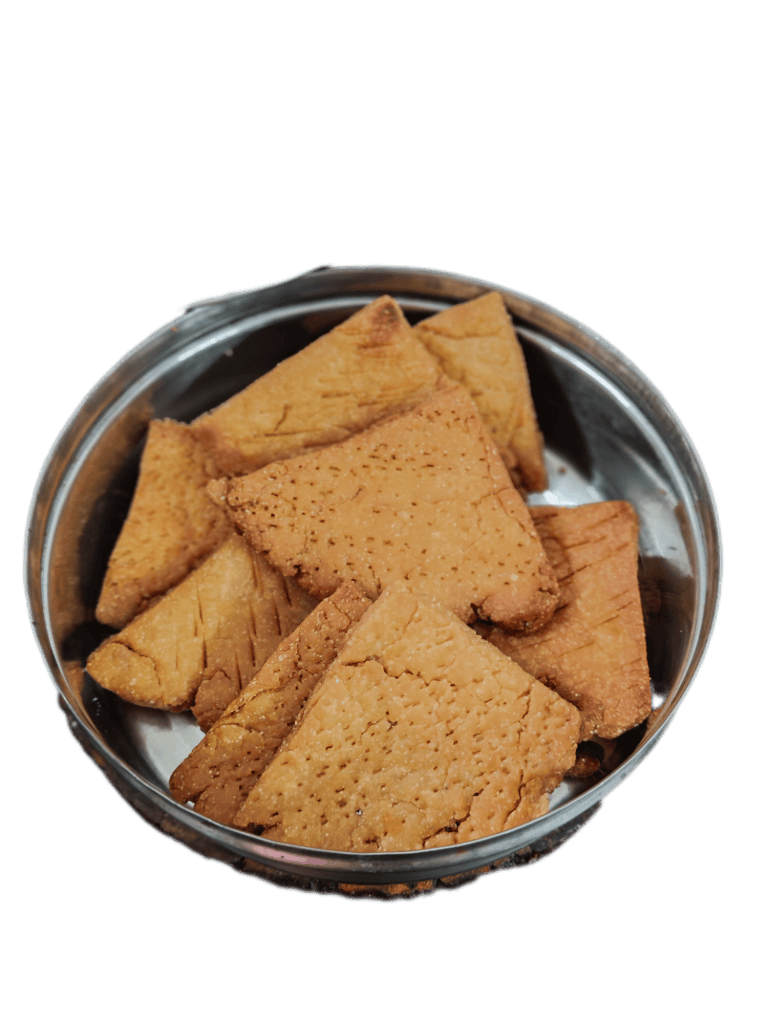
⏳ Shelf Life
When properly fried, completely cooled and stored in a clean, dry airtight container, Sindhi Gach can generally stay good for approximately 2–3 weeks at room temperature.
For the best texture and flavour, enjoy them while they are fresh and crisp.
Important:
Shelf life depends on:
- Proper frying
- Complete cooling
- Moisture level
- Storage conditions
- Humidity
- Clean handling
If you notice an unusual smell, moisture, mould or change in taste, discard them.
💪 Nutrition – Approximate
Because the exact amount of oil absorbed during frying varies, nutrition can only be estimated.
For the complete recipe of 8 Chothas, the approximate energy may be around:
1,900–2,200 calories
That gives approximately:
240–275 calories per Chotha
Protein may be approximately:
4–5 g protein per Chotha
These figures are estimates and can vary substantially depending on the exact ingredients, sugar syrup used and especially the amount of oil/ghee absorbed during frying.
🌿 Benefits / Positive Features
While Gach is a traditional festive sweet rather than a low-calorie food, it does offer some practical qualities:
🌾 Semolina
Adds texture and contributes carbohydrates.
🧈 Ghee
Provides richness and characteristic flavour.
🌿 Cardamom
Adds a naturally aromatic flavour without needing artificial flavouring.
🏡 Homemade
You control the ingredients, sweetness and frying method.
🎉 Traditional Value
It helps preserve traditional Sindhi culinary practices and family recipes.
💡 8 Tips & Tricks for Perfect Sindhi Gach
1️⃣ Keep the dough stiff
Don’t make soft roti-style dough.
2️⃣ Add syrup gradually
Different flour brands absorb liquid differently.
3️⃣ Don’t over-knead
Bring the dough together with firm palm pressure but don’t develop a soft, stretchy dough.
4️⃣ Maintain approximately ½-inch thickness
This helps preserve the characteristic thick Gach texture.
5️⃣ Always prick the pieces
Prick both the surface and edges.
6️⃣ Don’t fry on high flame
The outside can brown before the centre cooks.
7️⃣ Don’t flip too early
Allow the outer surface to set first.
8️⃣ Cool completely before storing
This is essential for maintaining crispness.
⭐ Pro Bonus Tip
For the most evenly cooked Gach, maintain a steady low-medium frying temperature instead of repeatedly increasing and decreasing the flame.
If the oil becomes too hot between batches, lower the flame briefly and allow the temperature to settle before adding the next batch.
❓ Frequently Asked Questions
1. Can I make Sindhi Gach without an oven?
Yes. Traditional Gach is prepared by deep frying, so an oven is not required.
2. Can I use oil instead of ghee in the dough?
Yes, although ghee gives the traditional rich flavour and aroma.
3. Can I use only maida? 1
You can, but semolina contributes to the characteristic texture, so keeping the specified semolina gives a more traditional result.
4. Why is my Gach breaking while frying? 2
The most common reasons are:
- Dough is too soft.
- Pieces were flipped too early.
- Gach was handled too much before the outer surface set.
- Oil temperature was unsuitable.
5. Why did my Gach become dark quickly? 3
The oil was probably too hot.
Reduce the flame and fry more slowly.
6. Why are my Gach not crispy? 4
Possible reasons include:
- Under-frying
- Excess moisture
- Too-soft dough
- Removing before properly cooked
- Storing while still warm
7. Why should I prick the Chothas? 5
Because the pieces are thick. Pricking helps release steam and reduces excessive puffing during frying.
8. Can I make the edges perfectly smooth? 5
Yes. You can gently shape the edges or use a suitable mould, although rustic edges are traditional and attractive.
9. Can I prepare the dough in advance?
It is preferable to prepare and use the dough within the same cooking session for the best texture.
10. Why should I not stack the raw Gach pieces? 6
Because they are delicate and can stick together or break while separating.
🔍 What Queries Does This Recipe Answer?
This recipe can answer searches such as:
✅ How to make authentic Sindhi Gach?
✅ What is Sindhi Gach / Gahch?
✅ What is Sindhi Chotha?
✅ How to make Sindhi Mithi Mani at home?
✅ How to make Sindhi cookies without an oven?
✅ How to make crispy fried Sindhi cookies?
✅ Why should Gach be fried on low flame?
✅ How thick should Sindhi Gach be rolled?
✅ Why do we prick Gach before frying?
✅ How to prevent Gach from breaking while frying?
✅ How to get crispy traditional Gach?
✅ How to store Sindhi Gach?
✅ What is a traditional Sindhi festive sweet?
✅ What can I make for a Sindhi Thali?
✅ What traditional Sindhi sweet can I make for Diwali?
🎯 💭 Your Feedback Matters to Us
💬 Question 1
Have you ever tasted traditional Sindhi Gach / Chotha before? Tell me in the comments! ❤️
💬 Question 2
What name do you call this traditional recipe in your family—Gach, Gahch, Chotha or Mithi Mani?
💬 Question 3
Which traditional Sindhi recipe would you like me to share next?
💬 Question 4
Do you prefer traditional recipes like this or modern fusion recipes?
💬 Question 5
Would you make these crispy Sindhi Gach for Diwali or a festive family gathering?
🌸 Conclusion
Sindhi Gach / Gahch / Chotha is a beautiful example of how traditional Sindhi cooking turns a few simple ingredients into something truly special.
The most important lessons are a stiff dough, approximately ½-inch thickness, proper pricking, gentle handling and—above all—patience while frying on low to low-medium flame.
Once completely cooled, these traditional Gach become beautifully crisp and crunchy, with the wonderful aroma of ghee and cardamom.
Whether you prepare them for a Mahalaxmi special occasion, Sindhi Thali, Diwali, a festive gathering, gifting, tea-time or simply to preserve a traditional family recipe, these homemade Sindhi Chothas are a delicious way to keep our culinary traditions alive. ❤️
Made traditionally, shared lovingly, and enjoyed with family—just the way a Sindhi recipe should be.
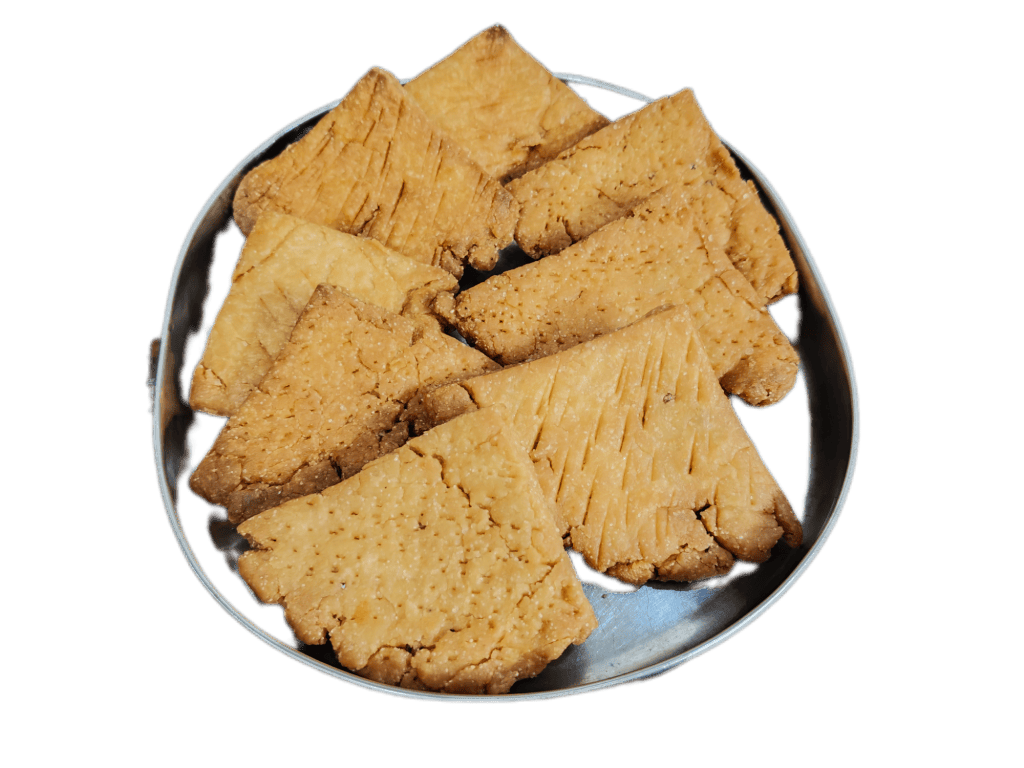
⭐👩🍳 Mahalaxmi Special Sindhi Gach / Chotha Recipe | Crispy Traditional Sindhi Mithi Mani Recipe – Step by Step with Pictures :-
Absolutely ❤️ Here is a 1-minute English version with only numbered instructions + one secret tip, keeping every important live-cooking point concise.
🌸 Sindhi Gach / Chotha – 1-Minute Recipe
1️⃣ Prepare Sugar Syrup
Soak ½ cup sugar + ½ cup water for 2 hours, stirring occasionally until the sugar dissolves completely. Strain if needed.
2️⃣ Prepare Cardamom
Crush 4–5 green cardamoms, remove the husks, and lightly crush the seeds.
3️⃣ Make the Dough
In a bowl, add 2 cups maida (250 g), ¼ cup semolina, ¼ tsp salt, ¼ cup ghee, and crushed cardamom seeds. Mix well until it resembles coarse breadcrumbs and holds its shape when pressed.
4️⃣ Add Sugar Syrup
Gradually add the prepared sugar syrup and make a tight, stiff dough. Do not make it soft like roti dough. Press and flatten the dough gently using both palms.
5️⃣ Rest & Divide
Cover and rest the dough for 10–15 minutes. Divide it into 2 equal portions and make dough balls.
6️⃣ Roll & Cut
Grease the rolling board and rolling pin with ghee. Roll each ball into a 5–6 inch disc, about ½ inch thick. Cut into 4 equal quarters (Chotha) using a knife or pizza cutter.
7️⃣ Prick the Chothas
Prick the surface and sides with a fork or knife to prevent excessive puffing and help the thick pieces cook evenly.
8️⃣ Fry Slowly
Heat oil or ghee on medium flame, check the temperature with a small piece of dough, then reduce to low-medium flame. Carefully slide in the Chothas.
9️⃣ Be Patient While Frying
Do not touch or flip them immediately. Let the surface set first. Then gently flip with a fork or slotted spoon and fry slowly until deep golden brown and crisp. Do not flip repeatedly.
🔟 Drain & Cool Completely
Remove carefully, drain excess oil, and allow the Gach to cool completely. They become darker and crunchier as they cool. Store in an airtight container.
⭐ SECRET TIP
Add the sugar syrup gradually—never all at once. The moment the dough becomes firm and stiff, stop adding syrup. A soft dough can make the Gach difficult to shape and more likely to break while frying.
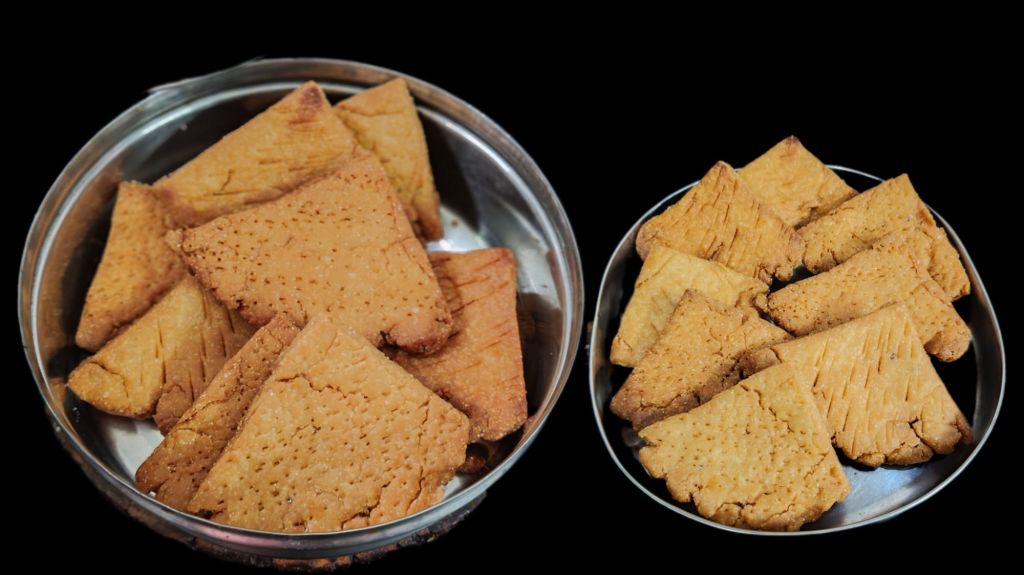
⭐👩🍳Authentic Sindhi Gach Recipe | Sindhi Chotha | Crispy Fried Mithi Mani | Traditional Sindhi Cookies –👩🍳 Easy Step-by-Step Instructions
1️⃣ ½ cup sugar + ½ cup water → soak for 2 hours, stir occasionally until completely dissolved.
2️⃣ Crush 4–5 green cardamoms → remove husks & lightly crush the seeds. 🌿
3️⃣ 2 cups maida (250g) + ¼ cup semolina + ¼ tsp salt + ¼ cup ghee + cardamom → mix until it holds together when pressed. 🥣
4️⃣ Add sugar syrup gradually → make a tight, stiff dough; don’t make it soft like roti dough. 🤲
5️⃣ Cover & rest for 10–15 minutes → divide into 2 portions and make balls. ⏱️
6️⃣ Grease board & rolling pin with ghee → roll 5–6 inch wide and about ½ inch thick. Cut into 4 equal quarters. 🔪
7️⃣ Prick the surface & sides with a fork → helps prevent puffing and cooks the thick pieces evenly. 🍴
8️⃣ Heat oil/ghee on medium → test with a small dough piece → reduce to low-medium and gently slide in the Gach. 🫕🔥
9️⃣ Let it set before flipping → then fry slowly until deep golden, crisp & cooked through. Flip gently and don’t flip repeatedly. ✨
🔟 Drain well & cool completely → it becomes darker and crispier as it cools. Store airtight. 🫙
⭐ Add the sugar syrup little by little and stop as soon as the dough becomes firm. This keeps the Gach easy to shape and helps prevent breaking while frying.
💡 Pro Bonus Tip: Patience is the secret to perfect Gach—slow frying on low-medium heat gives a crisp outside and properly cooked centre without burning. ❤️
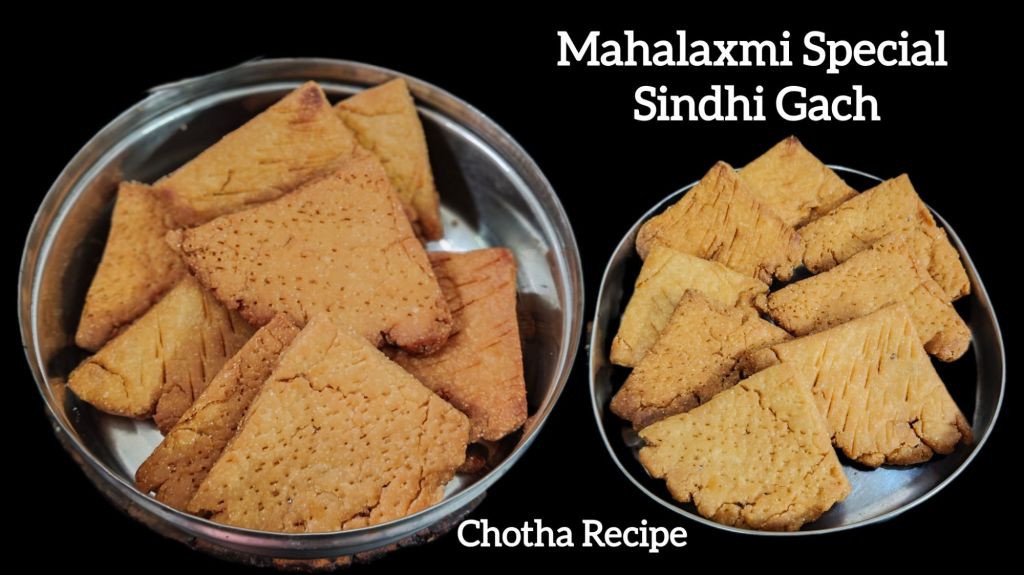
🎥 👉 THIS RECIPE IN VIDEO
📌 Want to see the complete recipe step by step?
If you would like to see exactly how I prepare these traditional Sindhi Gach / Chothas—including the correct stiff dough consistency, rolling thickness, pricking technique and the most important low-flame frying process– without breaking them?
👉 Watch my complete step-by-step recipe video, where I show all the important live cooking steps, including the stiff dough, thick rolling, pricking and slow low-flame frying technique.
I have shown each step practically so you can easily follow along and make these crispy, traditional Sindhi Mithi Mani at home.
👉 Watch & make this authentic Sindhi festive special along with me! ❤️
If you try this recipe, I would love to know how your Gach turned out. Share your experience in the comments!
❤️⭐👩🍳 Instructions – Easy Short Steps
🍚 Sugar Syrup → ½ cup sugar + ½ cup water → soak 2 hrs → stir & dissolve
🌿 Cardamom → 4–5 green cardamoms → crush → remove husks → crush seeds
🥣 Dough → maida + semolina + salt + ghee + cardamom → mix → add syrup → stiff dough
⏱️ Rest → cover dough → rest 10–15 min → divide → make balls
⭕ Roll → grease board + rolling pin → roll 5–6 inch → ½ inch thick
🔪 Cut → roll → cut into 4 equal quarters → make Chotha
🍴 Prick → prick top + sides → prevent puffing → even cooking
🔥 Fry → medium heat → test oil → low-medium heat → add Chotha
✨ Cook → let it set → flip gently → slow fry → deep golden + crisp
🫙 Cool & Store → drain → cool completely → airtight container
⭐ Secret Tip → sugar syrup little by little → stiff dough → don’t make it soft
💡 Pro Bonus Tip → slow fry + low-medium heat → crisp outside + perfectly cooked centre ❤️ ❤️
Tips and Tricks For Perfect Sindhi Chotha / G^acch / Gahch
❤️⭐ Sindhi Gach / Chotha – Tips & Tricks | Part 1 👩🍳✨
Want to make perfectly crispy and delicious Sindhi Gach? Try these 6 easy Tips & Tricks! 🌸
In Part 1, learn the right way to:
🍚 Prepare the sugar syrup
🌿 Use cardamom for natural flavour
🧈 Add the right amount of ghee
🤲 Get the perfect dough consistency
📏 Roll the Gach to the correct thickness
🍴 Prick the Gach properly before frying
⭐ Plus, a Pro Bonus Tip to make the Gach easier to shape and help prevent it from breaking while frying. ❤️
Tips and tricks Part – 1
1️⃣ 🍚 Sugar Syrup → Make sure the sugar is completely dissolved → no sugar crystals should remain.
2️⃣ 🌿 Cardamom → Separate the husks → lightly crush the seeds → this gives a beautiful natural aroma.
3️⃣ 🧈 Ghee → Mix the ghee well into the flour mixture → it should hold its shape when pressed → this helps create a crisp texture.
4️⃣ 🤲 Dough Consistency → Add sugar syrup little by little → make a firm, stiff dough → don’t make it soft like roti dough.
5️⃣ 📏 Correct Thickness → Roll the Gach about ½ inch thick → avoid making it too thin → this gives the traditional texture.
6️⃣ 🍴 Pricking → Prick the top and sides with a fork → helps prevent excessive puffing → allows the thick Gach to cook evenly.
⭐💡 Pro Bonus Tip → Keep the dough firm and stiff and add the sugar syrup gradually. This makes the Gach easier to shape and helps prevent breaking while frying. ❤️
If you find these tips helpful, Like ❤️ | Save 🔖 | Share ↗️ | Follow/Subscribe 🔔
💬 Which tip do you find most helpful? 👩🍳✨
❤️⭐ Sindhi Gach / Chotha – Tips & Tricks | Part 2 👩🍳✨
Want perfectly golden, crispy and evenly cooked Sindhi Gach? Try these 6 important frying and storing tips! 🔥
In Part 2, learn the right way to:
🫕 Check the oil temperature
🔥 Fry slowly on low-medium heat
🤏 Let the Gach set before touching
🔄 Flip gently without breaking
✨ Fry until deep golden and crisp
❄️ Cool completely before storing
⭐ Plus, a Pro Bonus Tip for frying in small batches so the oil temperature stays steady and every Gach cooks evenly. ❤️
Tips and tricks Part – 2
1️⃣ 🫕 Oil Temperature → Heat on medium first → test with a small dough piece → reduce to low-medium before frying.
2️⃣ 🔥 Slow Frying → Keep the flame low-medium → fry patiently → this helps the thick Gach cook evenly without burning.
3️⃣ 🤏 First Few Minutes → Don’t touch or flip immediately → let the surface set → then turn gently.
4️⃣ 🔄 Gentle Flipping → Use a fork or slotted spoon → flip carefully → avoid repeated flipping to prevent breaking.
5️⃣ ✨ Perfect Colour → Fry until deep golden brown → don’t remove too early → the Gach becomes crispier as it cools.
6️⃣ ❄️ Cool Completely → Drain excess oil → cool fully before storing → sealing while warm can make it soft.
⭐💡 Pro Bonus Tip → Fry in small batches → leave enough space between the pieces → this keeps the oil temperature steady and helps every Gach fry evenly and crisp. ❤️
If these tips are helpful, Like ❤️ | Save 🔖 | Share ↗️ | Follow/Subscribe 🔔
💬 Which frying tip was most helpful for you? 👩🍳✨
👉 Save this recipe & try today ❤️
👉 ❤️ Don’t forget to LIKE, SHARE & SUBSCRIBE for more easy & delicious recipes
❤️ If you enjoy this recipe, pleaseLike, Share, Comment and SubscribetoMeena Manwani Cooking Tutorialfor more easy, healthy and delicious recipes.
——————–
🎯 ★★ If you like this recipe, you can also try other recipes such as :-
★Brown pulao (sindhi bhuga chawanr)
★Perfect Idli & Idli batter
★Green moong dal khichdi
★Green moong dal curry
★Methi na dhebra (gujrati recipe)
★Boiled aloo ki sabzi
★Palak chana dal sabzi (sindhi sai bhaji)
★Paneer bhurji
★Aloo ki sukhi sabzi (aloo fry)
★Kala chana sabzi
★Mutter paneer
★Kamal kakdi ki sabzi (sindhi bhee patata)
★ Pattagobhi-mutter ki sabzi
★ Methi-mutter-aloo ki sabzi
★ METHI PARATHA
Thank you so much for visiting our recipe blog.
Your reviews are heartily invited.
आपको मेरा यह आर्टिकल अगर पसंद आया हो तो इसे लाइक और शेयर करें, साथ ही ऐसी ही रेसिपीस के लिए Meena Manwani Cooking Tutorial के साथ जुड़े रहें।


Leave a comment